Discord authentication
In order to set up Discord authentication, you need to register an application on Discord. This can be done from the Discord website.
Registering an application
Go to https://discordapp.com/developers/applications/ and log in with your Discord account.
Click on “Create an application”.
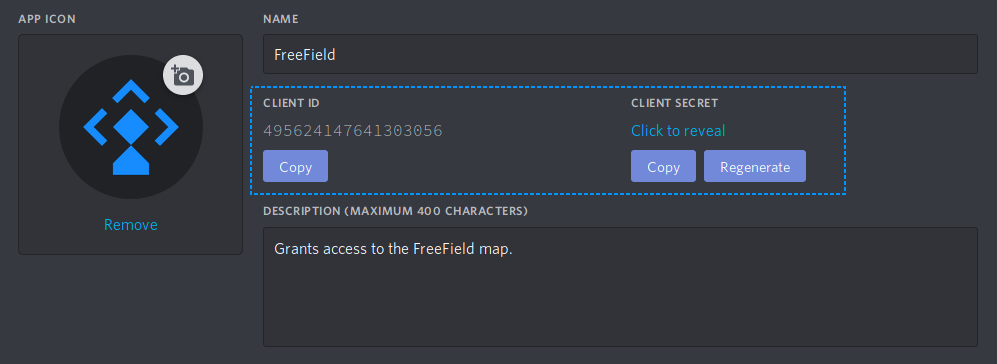
Give your application a name and description.
Tip
You should choose a name that reflects the community you have set up FreeField for. A good idea is to use the name of your community, or a location-specific name such as “New York FreeField.” You may optionally upload an icon for your application, which will be displayed when users attempt to authenticate.
Take note of the “Client ID” and “Client Secret” assigned to your application:
- On the same page, look for “OAuth2” in the sidebar menu. Click on it to navigate to the authentication options.
- In the “Redirects” section, add a new redirect and paste the redirect URL for
FreeField’s implementation of OAuth2 with Discord. This URL is
auth/oa2/discord.php, relative to your installation path. E.g. if you have installed FreeField tohttps://example.com/freefield/, the redirect URL would behttps://example.com/freefield/auth/oa2/discord.php.
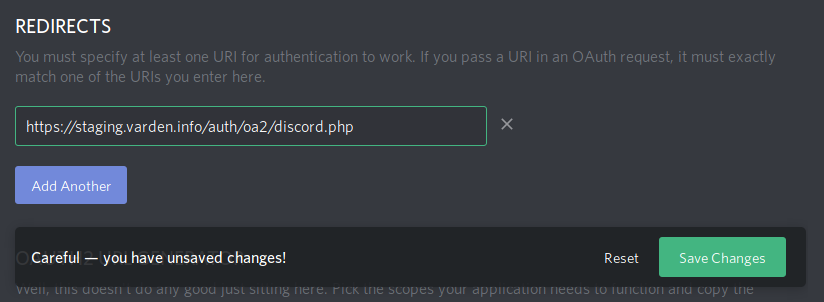
- Ensure that you click the “Save changes” button at the bottom of the page (see the above screenshot). It is recommended that you reload the page after saving changes to ensure that the redirect URL was added.
Enabling Discord authentication in FreeField
After you have registered an application on Discord, you can configure FreeField to use Discord for authentication.
- In the FreeField administration pages, navigate to the “Authentication” menu.
- In the Discord section, check the box next to “Enable Discord authentication” and paste the client ID and secret you got from Discord in the relevant fields.
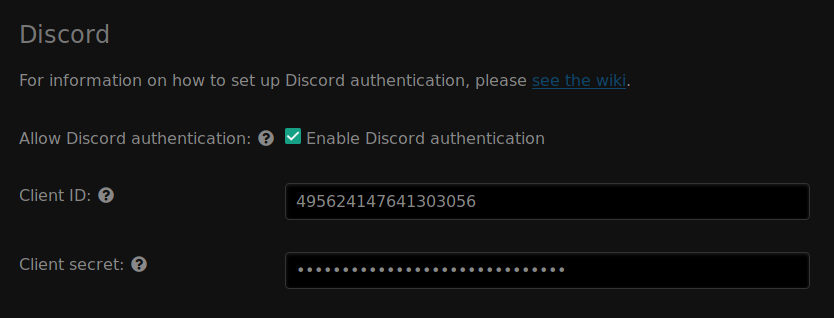
- Save the setting using “Save settings” at the bottom of the page.
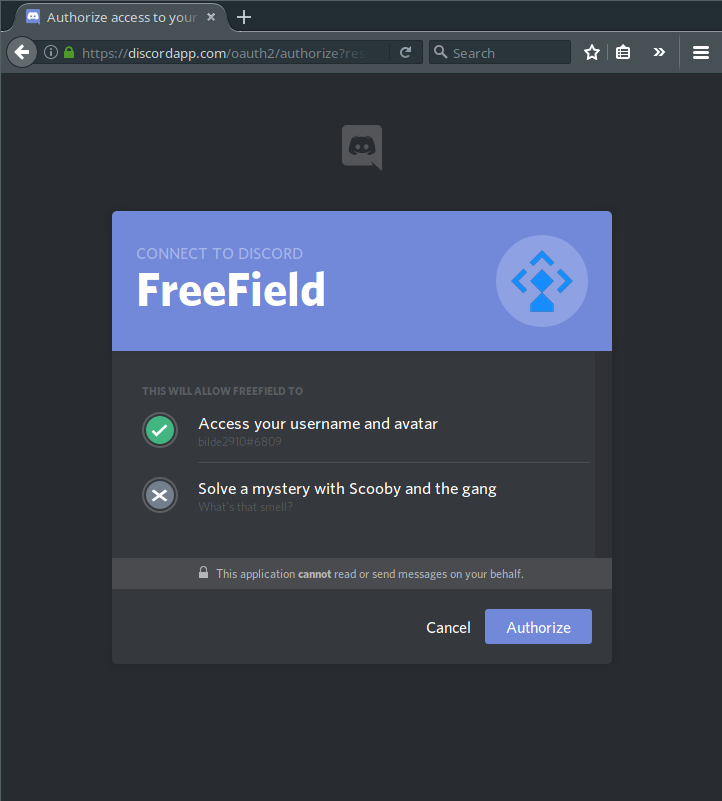
Authentication preview
When users authenticate with FreeField through Discord, they will see an authentication prompt similar to this: