Geofencing
FreeField supports restricting the geographical scope and coverage of various functionality through geofencing.
Note
If you have just set up FreeField, it is highly recommended that you set up a geofence that defines the boundary of the region you are covering with FreeField, to prevent users from submitting Pokéstops to the map in areas that are not supposed to be covered by your map. To do this, please follow the steps in Defining a boundary below to create a geofence that covers your entire community area, then follow the instructions in Limiting Pokéstop submission to apply the fence to FreeField and restrict usage of FreeField to the area within the defined geofence.
A geofence is a list of three or more coordinate pairs that together make up a polygon covering a certain geographical area. Geofences can be set up on the “Geofences” section on the administration pages. This documentation entry will guide you through creating and installing a geofence in FreeField, and then using it to restrict the map to only being used in certain regions.
Defining a boundary
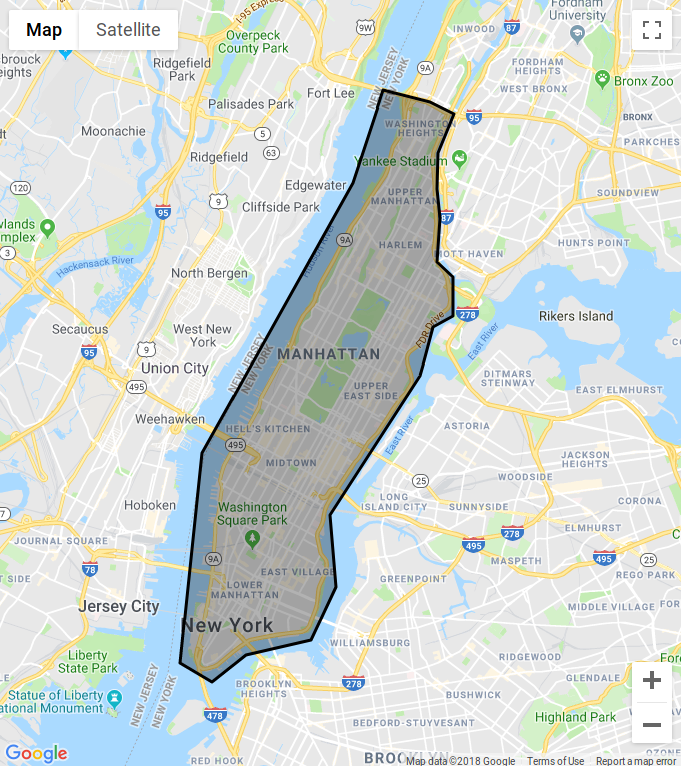
The easiest way to define a boundary for a geofence is to use an online geofence editor. Here are links to a couple:
Draw an area on the geofence editor that corresponds to the area that you wish to cover with FreeField:
Once you have drawn the geofence, export the geofence to a list of coordinate pairs. In FreeField, navigate to the “Geofences” section of the administration pages. Click on Add new geofence, enter a name for your geofence to easily identify the area it covers, and paste the coordinate pair list in the text box in the “Vertices” column.
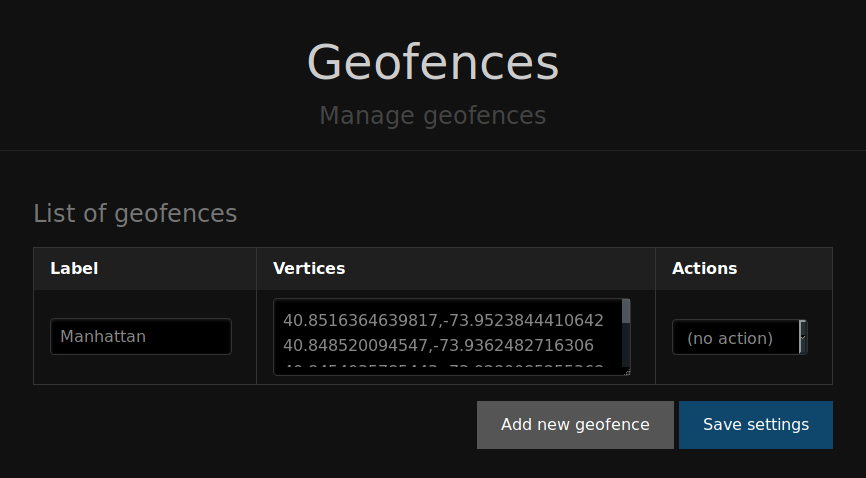
Finally, click Save settings. Your geofence is now saved and ready to be used elsewhere.
Limiting Pokéstop submission
A crucial step in securing your FreeField installation is restricting it to only be usable within the bounding area that your community covers. To do so, first define and install a geofence as defined in Defining a boundary that covers the entire area you wish to support FreeField for.
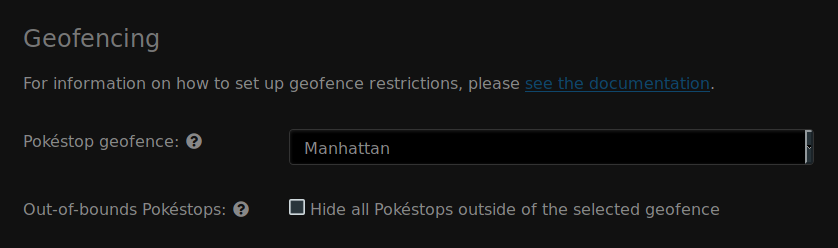
After you have defined a geofence, navigate to the “Map settings” section of the administration pages. Scroll down until you find the “Geofencing” header. In the “Pokéstop geofence” box, select the geofence you just defined, and click on Save settings.
Tip
There is a setting that allows you to hide all Pokéstops outside of the selected geofence boundary. This is useful if you previously allowed Pokéstop submission outside the current boundary - all of those Pokéstops will be hidden, and can research can no longer be submitted on them while the geofence is in effect and while this setting is active.
Warning
If you delete the geofence that is used to limit Pokéstop submission, the setting will revert to the default setting (no geofences applied), again allowing Pokéstop submissions globally. Make sure to define a new geofence and to update this setting again if you ever delete this geofence.
Applying geofences to webhooks
Geofences can easily be applied to webhooks. Each webhook has an option labeled “Geofence” where you can select any geofence defined as described on this page. When you apply a geofence to a webhook, the webhook will only be triggered if the Pokéstop that the field research is reported on is within the bounds of the selected geofence.